Worm farming also known as vermicomposting, is the process of using worms to break down organic waste into nutrient-rich compost.
This environmentally friendly practice not only helps recycle kitchen scraps and other organic materials, but also produces a natural, chemical-free fertilizer that can significantly benefit your garden or houseplants.
In this comprehensive guide, we will walk you through the process of starting your very own worm farm, from choosing the right worms to maintaining and harvesting the compost they produce.
Choosing the Right Worms
A key factor in creating a successful worm farm is selecting the appropriate type of composting worms.
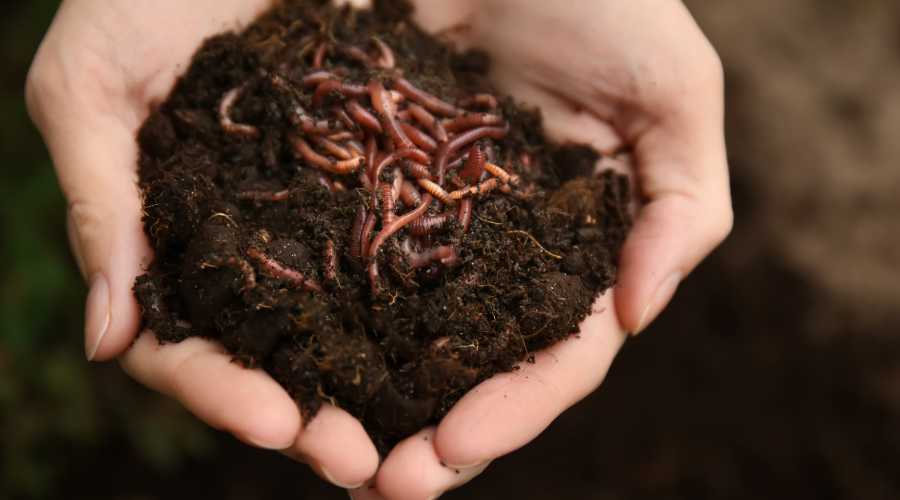
The two most common species used for vermicomposting are:
- Red wigglers (Eisenia fetida) – These worms are the top choice for most worm farms because they thrive in confined spaces, reproduce quickly, and have a hearty appetite for decomposing organic material.
- European nightcrawlers (Eisenia hortensis) – Slightly larger than red wigglers, these worms are also suitable for vermicomposting but may require more space.
To source your worms, consider contacting local garden centers or searching for online retailers that specialize in composting worms.
When determining the number of worms you need, a general rule of thumb is to start with one pound of worms for each square foot of surface area in your worm bin.
Setting Up Your Worm Bin
The worm bin is the central component of your worm farm.
Here’s what you need to know to create an ideal environment for your worms:
Choosing the right bin: Worm bins can be made from a variety of materials, including plastic, wood, or even pre-made commercial options. When selecting a bin, consider the following factors:
- Plastic bins – These are affordable and easy to find but may not provide adequate ventilation. Make sure to drill holes in the lid and sides for air circulation.
- Wooden bins – These offer better insulation and breathability but may require more maintenance over time as they can rot from the moisture.
- Commercial worm bins – Designed specifically for vermicomposting, these bins often come with built-in features that make the process more efficient.
Size and location considerations: Choose a bin size that will accommodate the number of worms you plan to start with, and make sure it is shallow (no more than 18 inches deep) to allow for proper aeration. Place the bin in a location with stable temperatures between 55-77°F (13-25°C) and protection from direct sunlight or extreme cold.
Preparing the bedding: To create a comfortable environment for your worms, use one or a combination of the following materials:
- Shredded paper or cardboard – Be sure to avoid glossy paper or colored ink, as these can be toxic to worms.
- Coconut coir – This natural fiber is a sustainable alternative to peat moss and provides excellent moisture retention.
- Peat moss – Although not as environmentally friendly, peat moss can be used as a bedding material if it is thoroughly moistened and mixed with other materials to prevent compaction.
Moisture and temperature control: Worms thrive in moist environments, so maintain a moisture level similar to that of a wrung-out sponge. Regularly monitor the temperature to ensure it stays within the optimal range.
Feeding Your Worms
Worms are not picky eaters, but it’s essential to know what types of food scraps are suitable and how much to feed them. Here are some guidelines:
Suitable food scraps:
- Fruits and vegetables – Almost any fruit or vegetable scrap can be added to the worm bin, but be sure to chop them into smaller pieces to speed up decomposition.
- Coffee grounds and filters – Worms enjoy coffee grounds, and the filters can also be broken down in the bin.
- Eggshells – Crushed eggshells provide a source of calcium and help maintain a balanced pH in the worm bin.
Foods to avoid:
- Citrus fruits and onions – These can be too acidic for worms and may harm them.
- Dairy and meat products – These can attract pests and create unpleasant odors.
- Processed foods – High salt and preservative content can be harmful to worms.
Feeding frequency and quantity:
Start by feeding your worms about half their body weight in food scraps per day.
Monitor how quickly they consume the food and adjust the feeding amount accordingly.
It’s better to underfeed than overfeed, as uneaten food can cause odors and attract pests.
Monitoring and maintaining bin conditions
Regularly check the moisture level, temperature, and overall health of your worm bin. If the bin becomes too wet, add more bedding material to absorb excess moisture. If it becomes too dry, lightly mist the bedding with water.
Harvesting Your Worm Compost
Once the worms have broken down the food scraps and bedding, it’s time to harvest the nutrient-rich compost, also known as vermicast. Here’s how:
Signs that compost is ready: Compost is typically ready to harvest when it resembles dark, crumbly soil and has an earthy smell. This process may take anywhere from two to six months, depending on factors such as worm population, bin size, and feeding frequency.
Harvesting methods:
- The migration method – Move the finished compost to one side of the bin and add fresh bedding and food scraps to the other side. Over time, the worms will migrate to the new food source, allowing you to harvest the compost without disturbing the worms.
- The screening method – Empty the entire contents of the bin onto a tarp or plastic sheet, and use a mesh screen to separate the worms from the compost.
Separating worms from compost: If any worms remain in the harvested compost, they can be gently picked out and returned to the bin.
Using Your Worm Compost
Worm compost is an incredibly valuable resource for your garden or houseplants. Here are some ways to use it:
- Benefits of worm compost (vermicast): Vermicast is rich in nutrients, beneficial microbes, and enzymes that promote healthy plant growth, improve soil structure, and increase moisture retention.
- Application in gardens and houseplants: Spread a layer of worm compost on the soil surface around plants, or mix it into the soil when planting or repotting. You can also create a “worm tea” by soaking the compost in water and using the resulting liquid as a natural fertilizer.
- Using as a natural fertilizer: Worm compost is an excellent alternative to chemical fertilizers, providing a slow-release source of essential nutrients that is safe for both plants and the environment.
Troubleshooting Common Issues
Worm farming is generally low-maintenance, but occasionally issues may arise. Here are some common problems and solutions:
- Odor problems: A healthy worm bin should have an earthy smell. If unpleasant odors arise, it may be due to overfeeding or excess moisture. Reduce the amount of food added, and mix in additional dry bedding to absorb moisture.
- Pest infestations: Fruit flies, ants, and other pests may be attracted to an improperly maintained worm bin. Ensure that the bin is not overfed, has proper moisture levels, and is covered with a layer of bedding material to discourage pests. If fruit flies become an issue, consider placing a vinegar trap nearby or covering the bin with a tight-fitting mesh screen.
- Worm population control: Over time, your worm population may grow beyond the capacity of your bin. To prevent overcrowding, consider dividing your worms between two or more bins, giving some away to friends or neighbors, or releasing a portion of them into a suitable outdoor environment, such as a compost pile or garden.
Conclusion
Vermicomposting offers an efficient and environmentally friendly way to recycle organic waste while providing nutrient-rich compost for your plants.